Creating breathtaking panorama photos isn’t just about having the right gear—it’s also about thoughtful technique and clever post-processing. In this post, we’ll walk you through exactly how we captured and edited a striking panorama of Perth’s night skyline, complete with vibrant reflections shimmering across the Swan River.
Let’s dive into how this image came to life—and how you can make your own panoramas in Photoshop!
📸 The Setup: Location, Gear & Camera Settings
We headed to South Perth Foreshore, one of the best vantage points to shoot Perth’s skyline. The calm of the Swan River at night provided the perfect opportunity to create a mirror-like reflection of the colourful city lights.
Our gear:
- Camera: Sony A7III (full-frame mirrorless)
- Lens: Tamron 28–75mm f/2.8
- Tripod: Absolutely essential!
- Number of Shots: 7 overlapping images (could have been less)
Camera settings:
- Aperture: f/11 – for deep depth of field and sharp detail across the frame
- ISO: 100 – to ensure the cleanest possible image with no noise
- Shutter Speed: 30 seconds – to smooth out the water and reduce ripples
We used manual focus and locked exposure to ensure consistency across all shots. Each image overlapped by around 30%, which is crucial for Photoshop to stitch everything seamlessly.
🖥️ Post-Processing in Photoshop: Step-by-Step
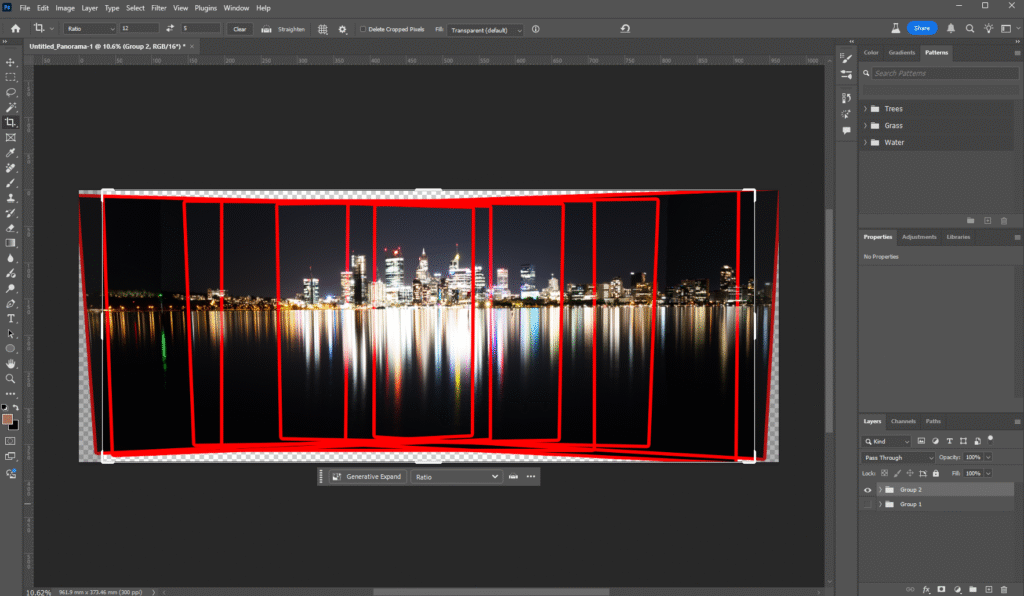
Once we had all 7 RAW files imported and lightly adjusted in Lightroom (basic exposure and white balance tweaks), we moved into Photoshop to merge them into a panorama.
Here’s how to do it:
1. Open Photoshop
Make sure all your files are saved in a single folder and are edited consistently (if you’re not using RAW files, just make sure they’re similar in tone and colour).
2. Go to:
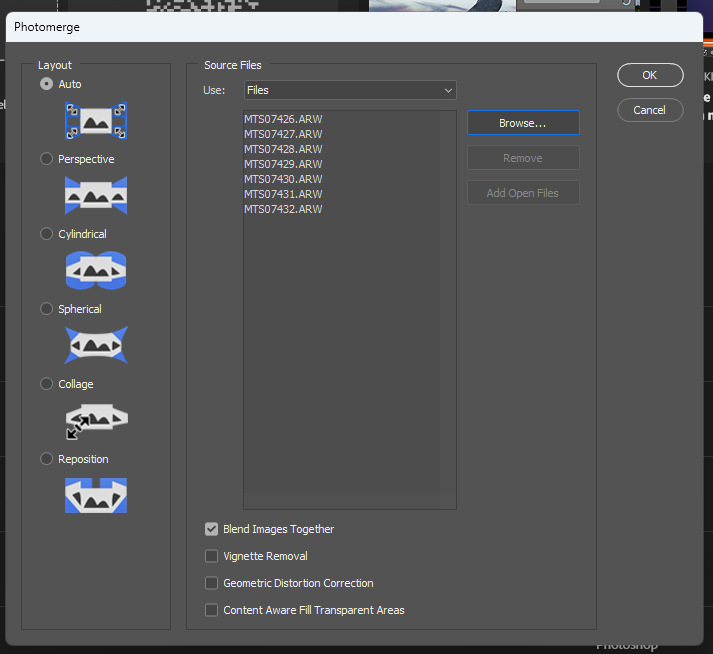
File > Automate > Photomerge
This opens the Photomerge dialogue box.

3. Choose the layout
Select Auto for layout. It’s usually the best choice for most panoramas, especially if you’ve shot them carefully with even overlap.
4. Add your files
Click “Browse” and select all the images you want to stitch.
✅ Leave the “Blend Images Together” option checked.
Then hit OK and let Photoshop do its thing!
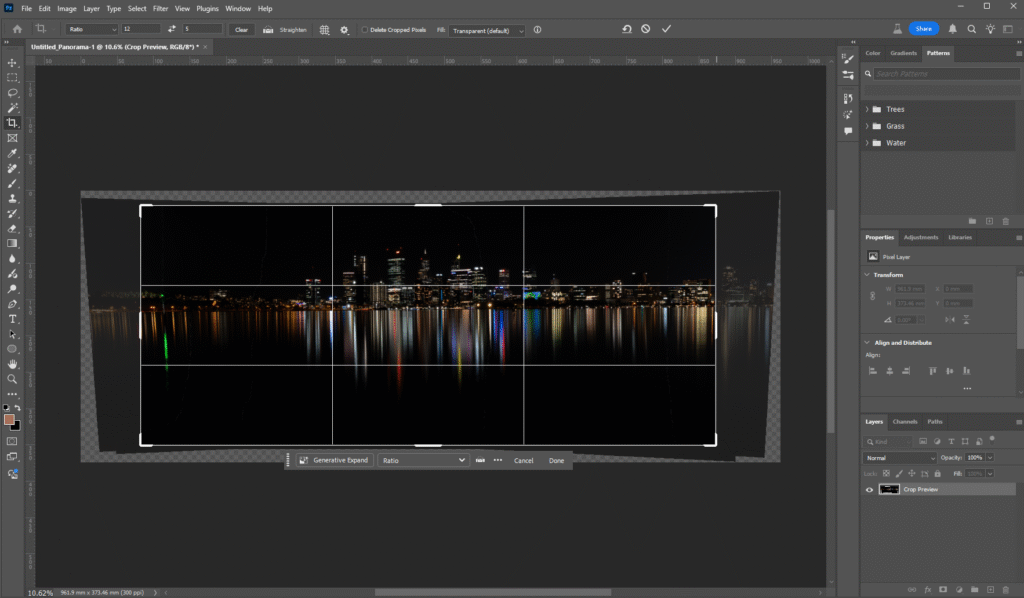
5. Crop the result
Once Photoshop finishes stitching the panorama, you might notice transparent edges. Use the Crop Tool to clean up the composition however you like. Don’t worry about losing a little of the image—focus on getting a strong final composition.

6. Enhance your image
This is where the magic happens. After stitching:
- Adjust levels and curves to bring out contrast
- Boost vibrancy and saturation to enhance the city lights
- Use selective colour adjustments to enhance the reds, purples, and blues in the skyline reflections
- Sharpen the final image just a touch for print or web
And that’s it—you’ve created a panorama that looks just as magical as the moment you pressed the shutter.
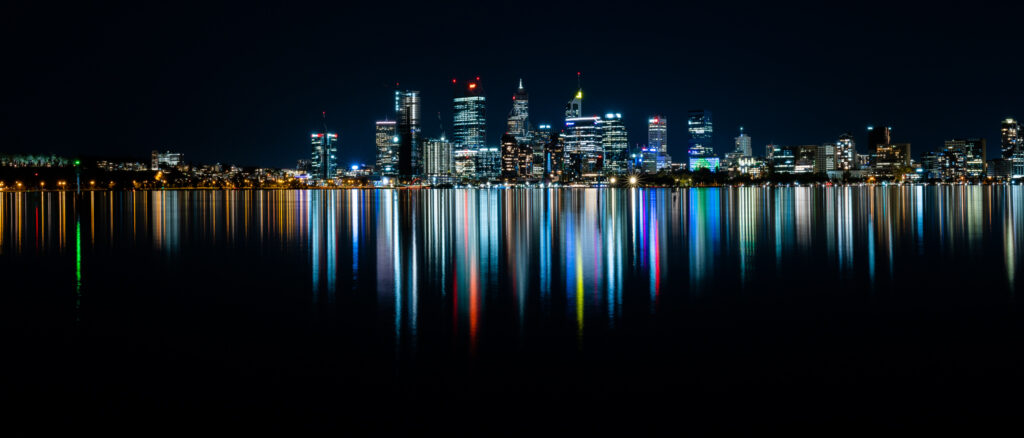
🌈 The Final Result
Our final photo captures Perth’s skyline at night, aglow with colour and motionless reflections across the water—thanks to that long exposure. It’s not just a photo; it’s a story told across seven frames, seamlessly stitched into one.

✨ Tips for Your Next Panorama
- Always shoot on a tripod
- Overlap each image by 25–30%
- Lock exposure and focus manually
- Use consistent settings across all shots
- Use Photoshop’s Auto layout unless you have a very specific need
Want Panoramas Like This for Your Brand or Wall?
At Eternal Hero Media, we don’t just take photos—we capture your story. Whether it’s stunning landscapes, fine art cityscapes, or branding visuals, we’re here to create meaningful images that stand out.
🎯 Get in touch to book a custom photoshoot or order prints!
